Dieffenbachia lower leaves keep falling off
Plant: Dieffenbachia
How long have you owned the plant? 1-2 years.
Plant Parent
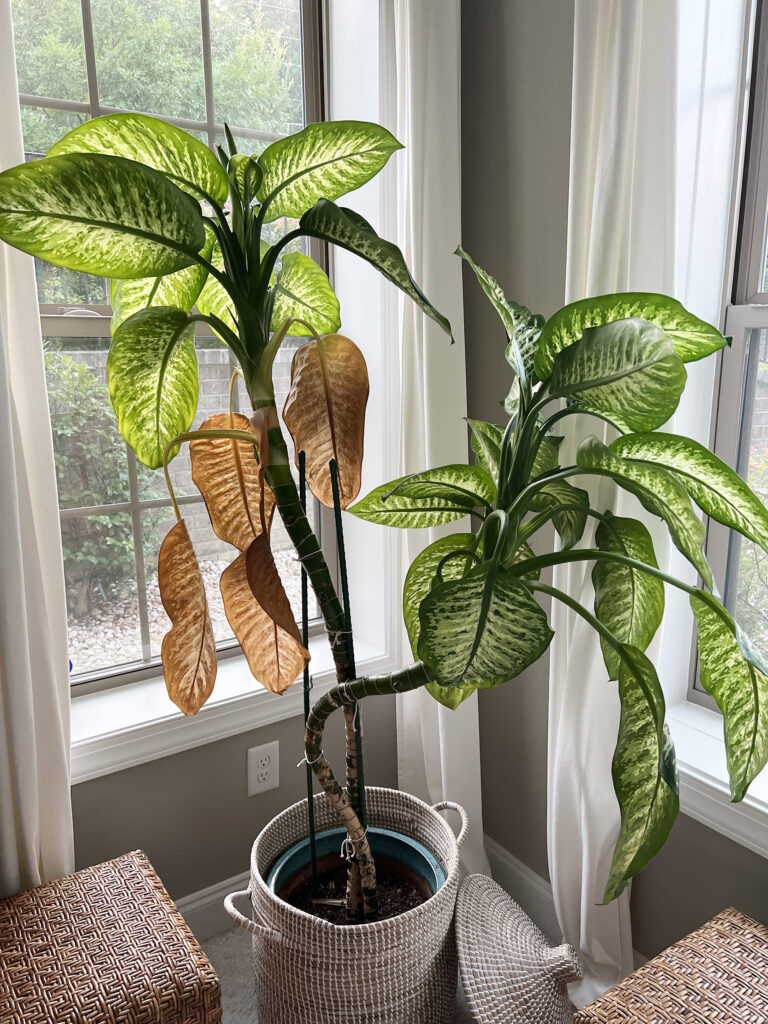
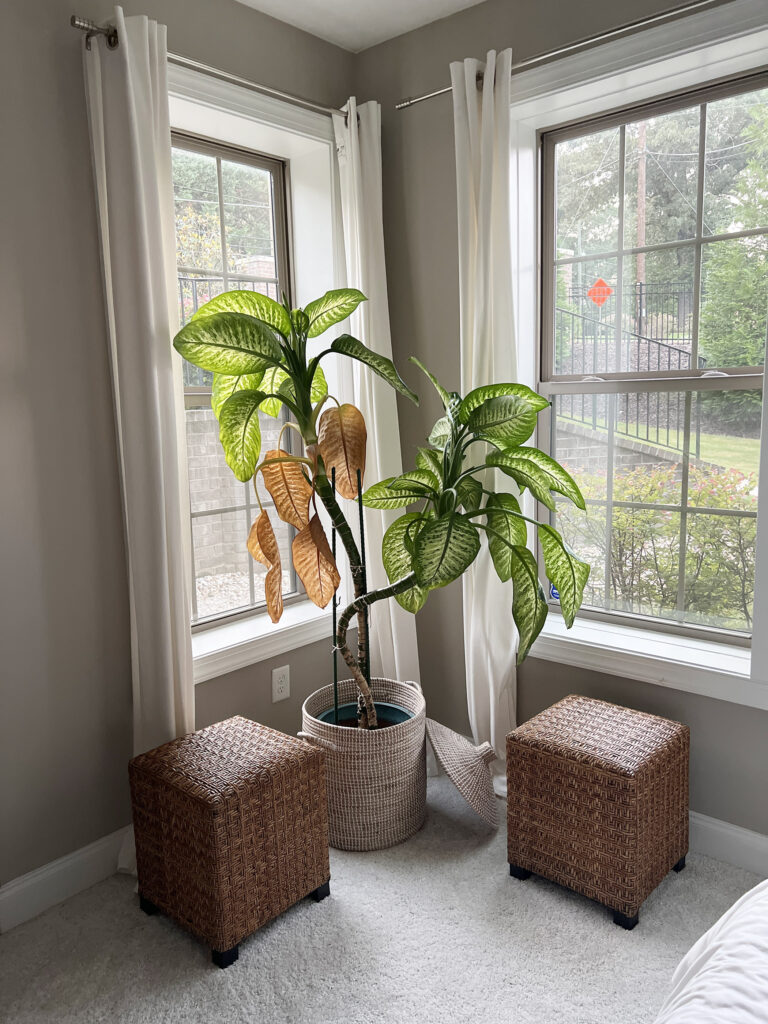
As plant grows upwards, leaves keep dying off but the plant seems to be generating new leaves. It has also shown inflorescence for the first time. We could never get it to branch off or give leaves on the shaft as it grew. It’s like she’s becoming a tree!
How do you determine WHEN to water? I wait for the soil to become completely dry.
Describe HOW you water: I fully soak the soil and let excess water drain away.
Light situation:
Fertilizer: I have recently started using Jacks Classic All-Purpose Water Soluble 20-20-20.
Darryl
Thanks for submitting your photos and care details!
Environment
Your light situation looks great for your Dieffenbachia – it has grown very well! The growth of an inflorescence is a testament to good light received over the years.
Effort
In terms of WHEN to water a Dieffenbachia, it should be watered when the soil is about halfway dry – not when it’s completely dry. In terms of HOW to water – fully soaking and letting excess drain away is correct. Regular use of fertilizer will ensure that leaves remain green ***as long as possible*** (not forever!)
My favorite fertilizers HERE
Expectations
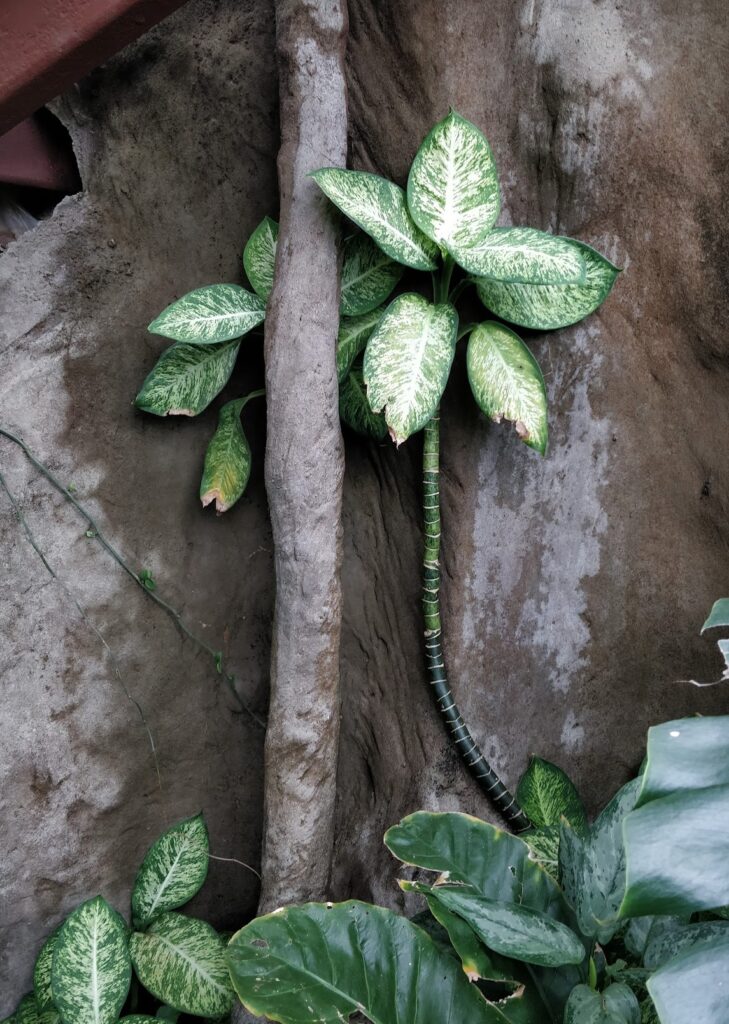
With regard to branching or getting leaves to grow along the trunk – that just doesn’t happen if you just let the plant grow without intervention. The growth habit of a Dieffenbachia is to keep growing foliage at the top of the plant as older leaves naturally die off from the bottom. That means, without intervention, the lower part of the plant will become a bare trunk. Here’s an example of a Dieffenbachia after a few years of growth:
The plant will only hold on to a maximum number of active leaves before retiring the older (lower) ones.
Given this reality and eventuality, you can restructure the plant more to your liking by a process called Air Layering – more details below…
Air Layering a Dieffenbachia
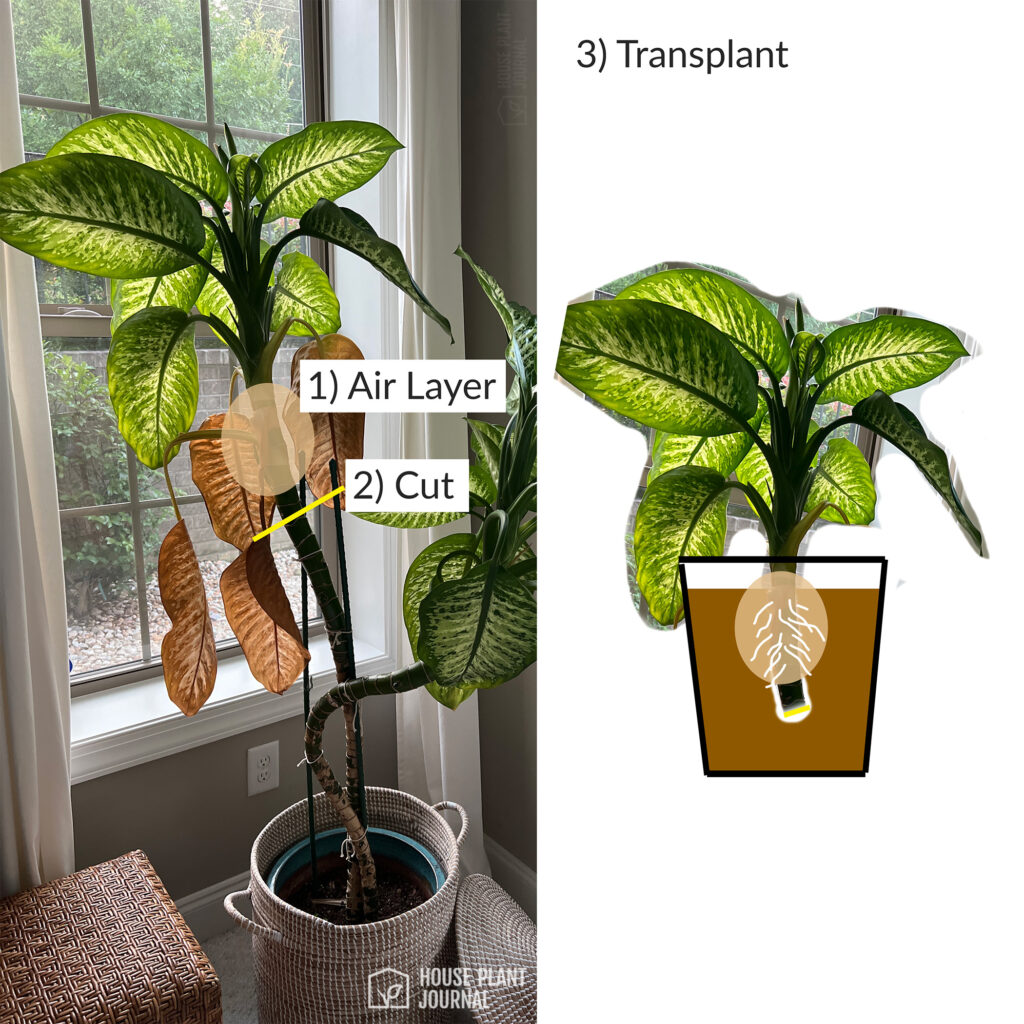
1) Air Layer
Materials needed: sphagnum moss, clean knife, plastic wrap, soft rubber ties
Procedure: cut a notch into the part of the stem where you want new roots to form – the notch only needs to be about a quarter of the diameter into the stem. Wrap the notch and surrounding stem area with moist sphagnum moss. Cover the sphagnum moss with plastic wrap and secure the top and bottom with the soft rubber ties. Once finished, the stem should look like this:
2) Cut
Over the next few weeks, you care for the plant as usual but you can occasionally check the moisture of the sphagnum moss – make sure it stays moist. Don’t let it go crispy. After a few weeks, maybe even a few months, you should see new roots forming in the sphagnum moss. Once this happens, you can completely cut the stem a few inches below where the roots have formed. When you air layer, the purpose is to keep the TOP of the plant but the bottom of the plant will still grow so you can either give it away or keep it so you have two plants.
3) Transplant
Prepare a container with new soil (can be the same properties as your old plant); I suggest 3 or 4 parts indoor potting soil with 1 part bark chips. The pot size can be the same as your previous pot or a size that will correspond nicely with the size of your foliage.
It’s important to understand the principles of propagation so you can accept the fact that the structure of your plant will change and, when it is no longer to your liking, you can reset it. There’s no need to be disappointed by inevitable change!
When you have good light and you’re watering/fertilizing accordingly, then you can accept leaf turnover – a yellowing leaf doesn’t necessarily mean something is wrong!
If you find yourself worrying about every yellowed leaf and every brown tip, it’s time to take a more sensible approach to houseplant care:
- Read my books: ‘The New Plant Parent‘ and ‘The New Plant Collector‘
- Take my online course: Essentials of Houseplant Enjoyment
- More detailed houseplant Q&As
Tired of your houseplants dying on you?
Sign up and I’ll do my best to help them live their best lives!