
3 critical tips to help you win the war on mealybugs
The longer you own houseplants, the more likely it is that you’ll encounter pests so it’s better to be prepared and know what to look for – and I don’t just want to give you the basic “use an alcohol dipped cotton swab” treatment. I want to help you know what to look for so you can take action at the very first positive identification – not just when there’s a lot of plant damage!
More Houseplant Pest Resources:
– Thrips (Photo Gallery and Treatment Methods)
– Scale (Photos and Treatments)
– Spider mites (Photos and Treatments)
but they keep coming back…
The most basic pest control that you’ll find everyone repeating is to use a cotton swab dipped in rubbing alcohol to dab the mealybugs. Upon contact, they’ll turn a rusty color as the alcohol dries up their little bodies. As satisfying as that may seem, you’re only going to kill the ones you can see. After a few days, you will find more – they will keep coming back – so I’m going to give you three super critical tips to help you in your fight!
Tip 1: See the larvae
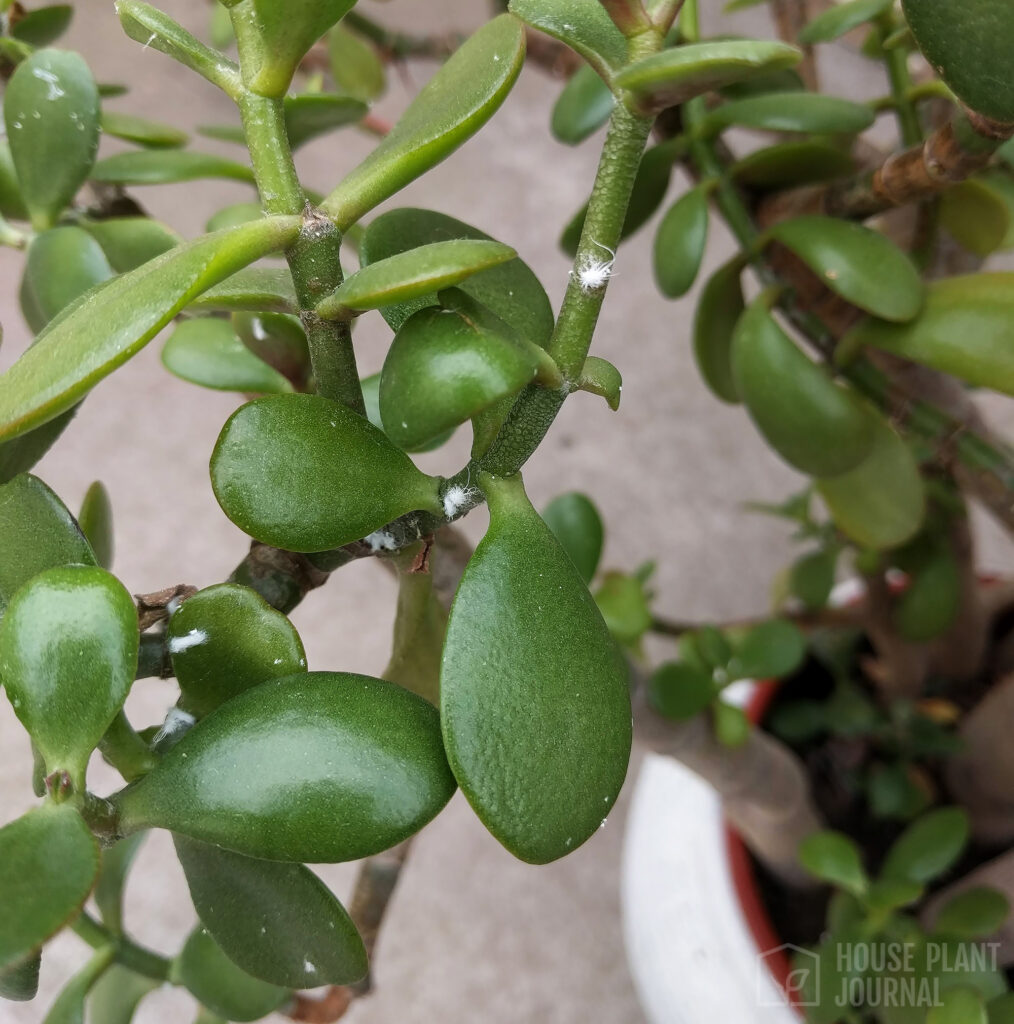
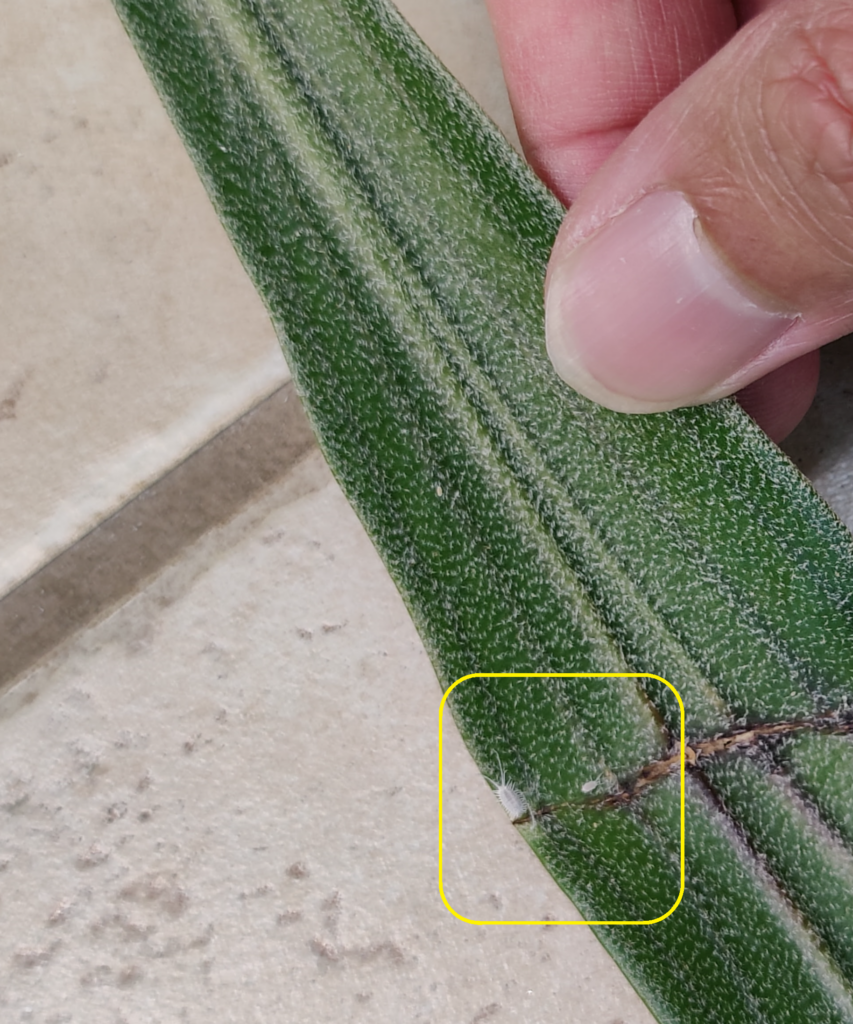
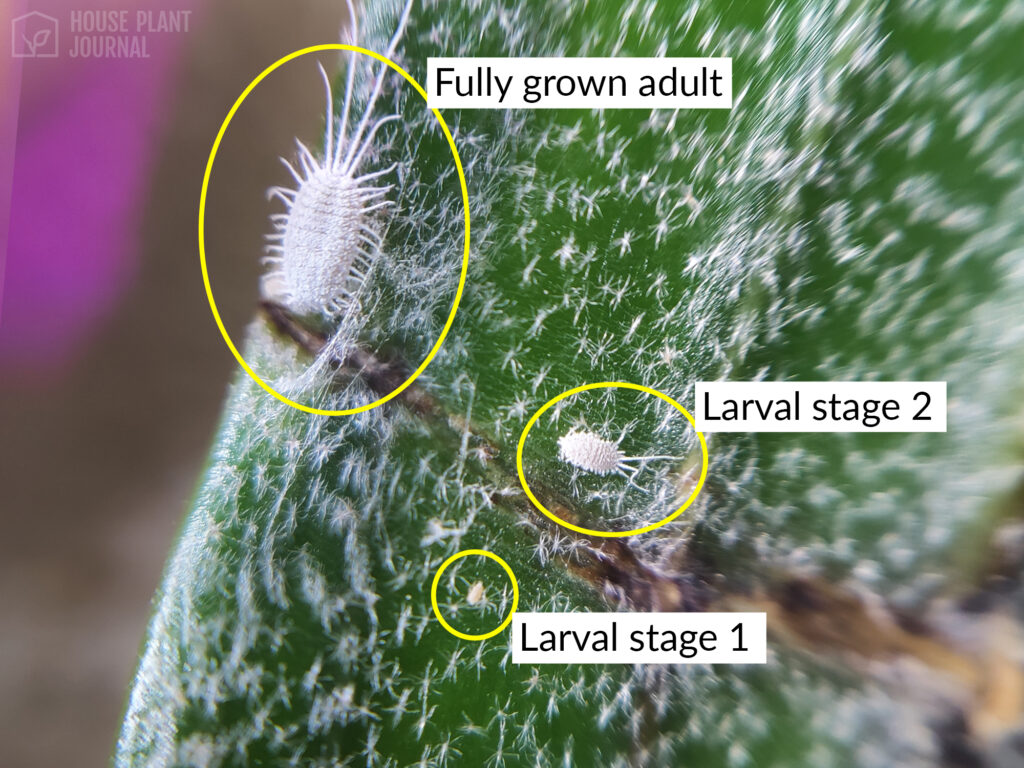
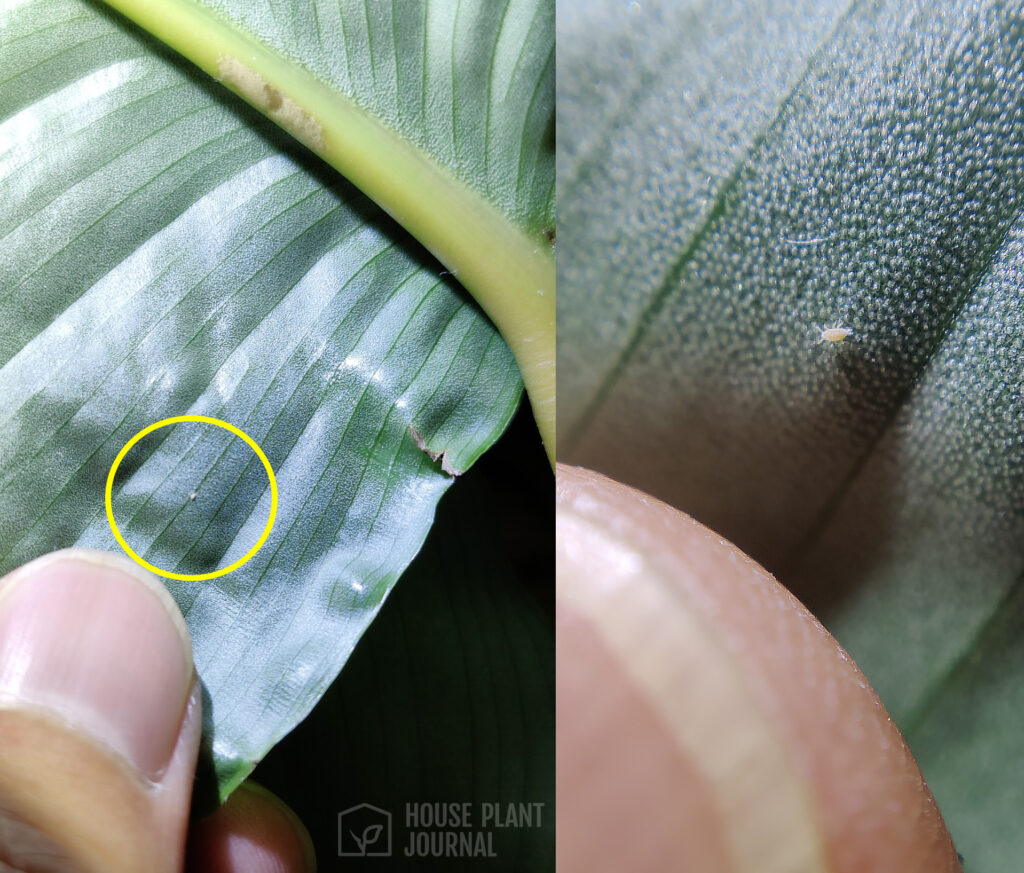
When people first learn to identify mealybugs, they see the oval shaped bodies with antennae. These are just the adult females that are quite easy to see – they’re a few millimeters in length. But the larvae (earlier stages of the insect) are a fraction of the size – sometimes less than 1 mm long. Once you learn to identify the earlier larval stages of the mealybug, you will significantly cut down their population growth. Just look at these photos and appreciate how small these mealybug larvae are and why you have probably been missing them.
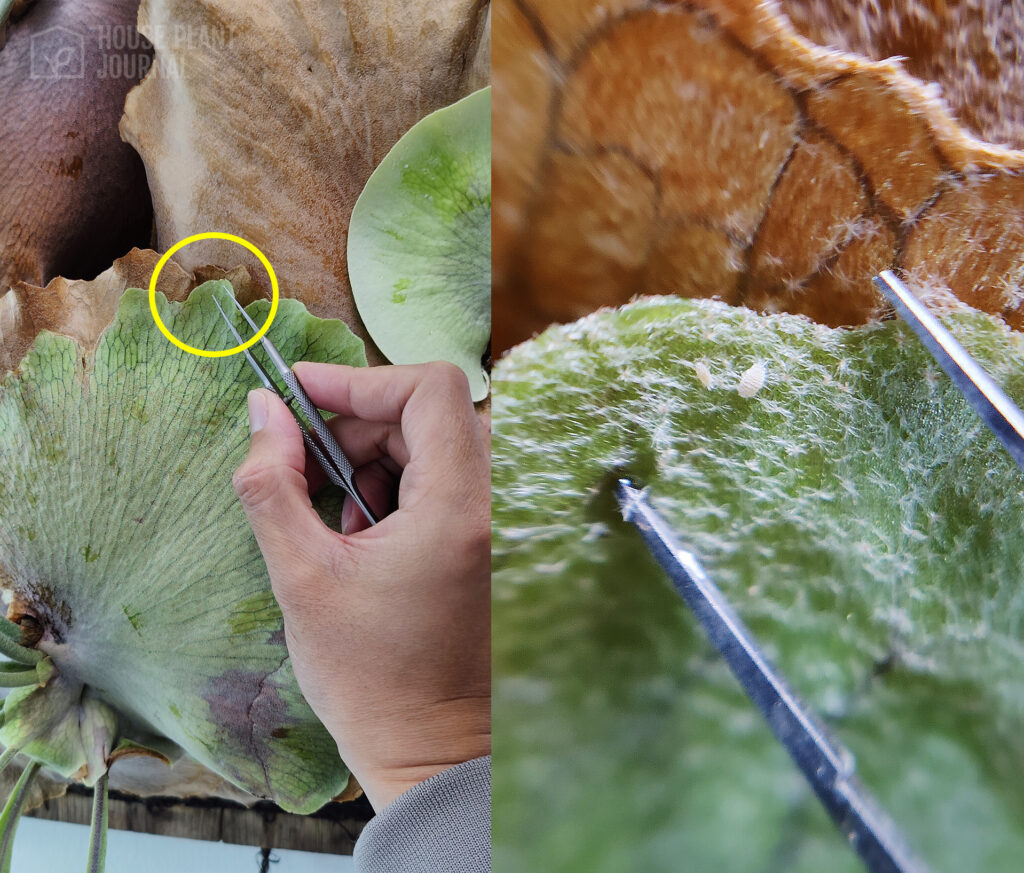
How to treat the larvae: here’s why I much prefer to use masking tape over alcohol swabs – masking tape will pick up the adults AND any nearby larvae with minimal damage to the plant. Dabbing the mealybugs will only kill the ones you are able to spot whereas the masking tape pulls off anything that is not part of the plant – obviously, this works best for plants with a stiff, waxy coating and not the kind that have hairs or delicate leaves. Trying to rub alcohol all over the stems and leaves in an effort to hit a larger area where you might find larvae isn’t great for the plant. Masking tape won’t damage the majority of plant tissues but use your judgement about the sturdiness of your particular plant.
My recommended pest-control products
Tip 2: Check Under and Around the Pot
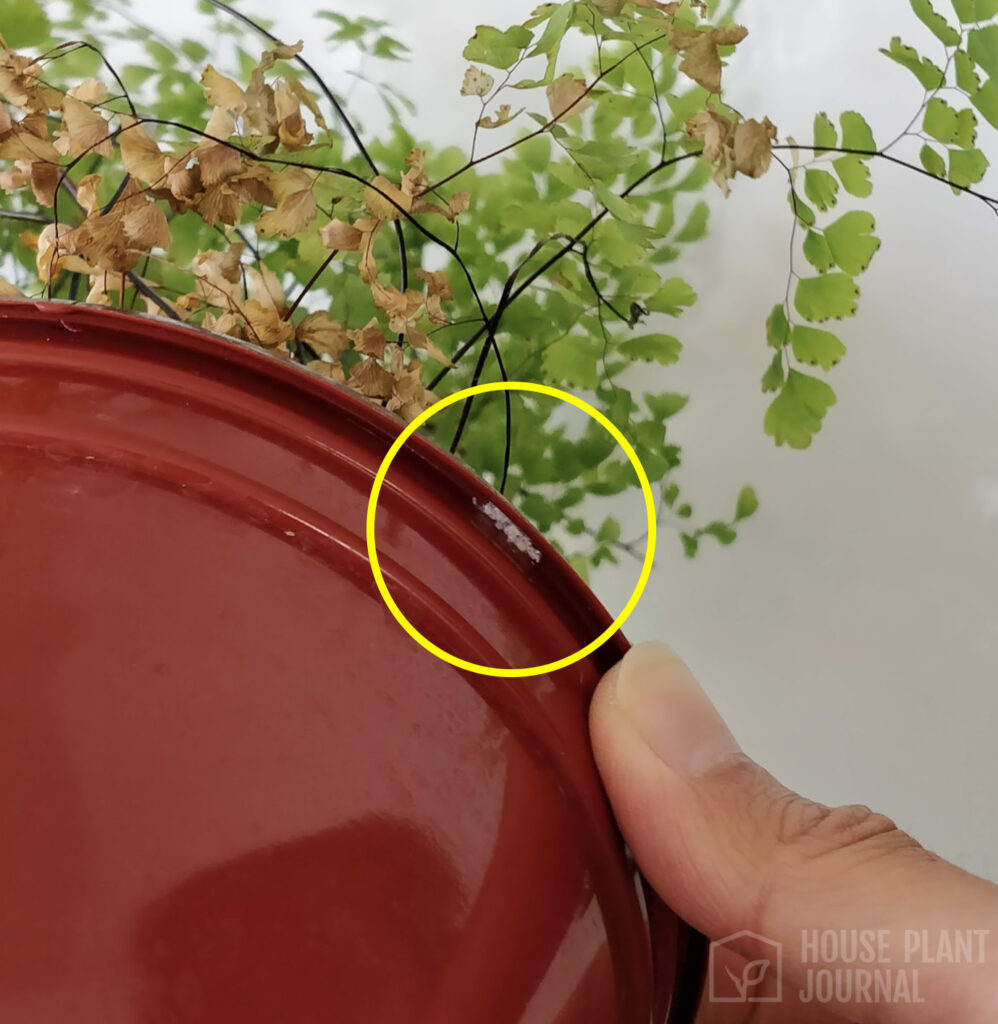
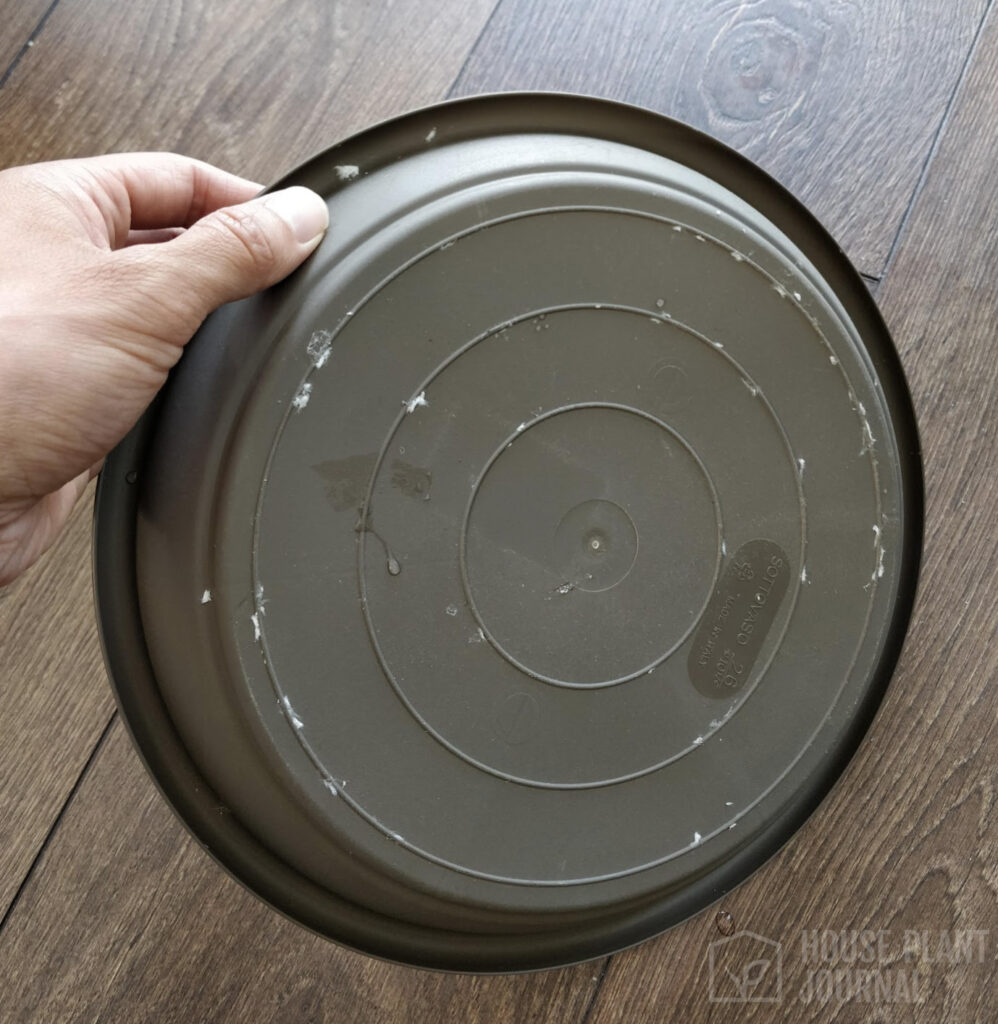
Perhaps the most insidious way a mealybug infestation keeps itself going is with hidden nests. Most houseplant care advice focuses on treatment on the plant itself and maybe the soil but mealybugs can also create their nests on the outside of the pot and even under the pot!
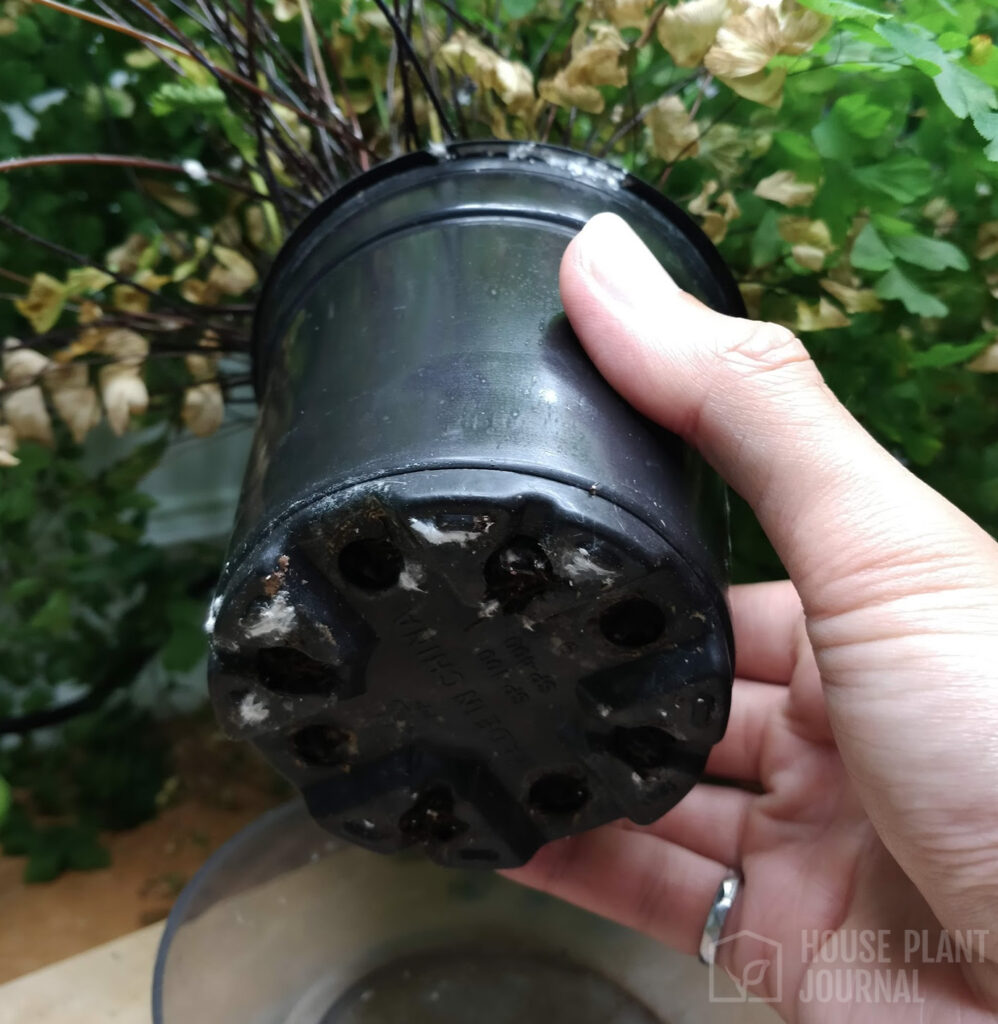
Identifying mealybug nests: look for any white cotton-like mass stuck to crevices in between stems and other hard surfaces: under the lip of the pot, under the pot near drainage holes, and even under saucers!
Treating mealybug nests: masking tape is fine for spot killing but for larger nests found on the outside of the pot, using soapy water is fine because it’s not going into the plant soil (regular soap is bad for plant roots; insecticidal soap is okay).
Isolating infested plant: I hope it has become clear that mealybugs can migrate to nearby plants that share a common surface – not just if the plants are touching. Therefore, be sure to completely isolate the infested plant.
Tip 3: Kill the Life Cycle
This one is more of a mindset tip: given that you now know about the tiny larvae that can easily hide themselves all over the plant and the hidden nests, you should realize that complete eradication is rarely possible with one go. Realistically, the eradication journey will probably start with one very thorough treatment session: pruning, masking tape killing, insecticidal soap treatment, cleaning outside/underneath the pot; then subsequent treatments will be less involved – perhaps just vigilantly removing adults/larvae with masking tape whenever you spot them and regularly observing under and around the pot for any developing nests and treating accordingly. These subsequent treatments will be ongoing for several weeks, maybe months depending on the degree of infestation.
The idea of killing the reproductive cycle is that you perform ongoing treatments at regular intervals (once a week, for example) so that new eggs that hatch into larvae are killed at the next treatment – and eventually, no new adults will be left to lay new eggs. Once the last eggs have hatched and those larvae killed, there will be no mealybugs left.
The life cycle of the mealybug is 6 to 8 weeks from egg to adult and every adult can lay hundreds of eggs, which means you should repeat the more thorough treatments each week while doing spot removal whenever you have a minute each day. You should notice fewer and fewer mealybugs each time you inspect the plant but don’t let up – stay on the lookout and be sure to keep checking the hiding places around the pot!
My books: The New Plant Parent | The New Plant Collector
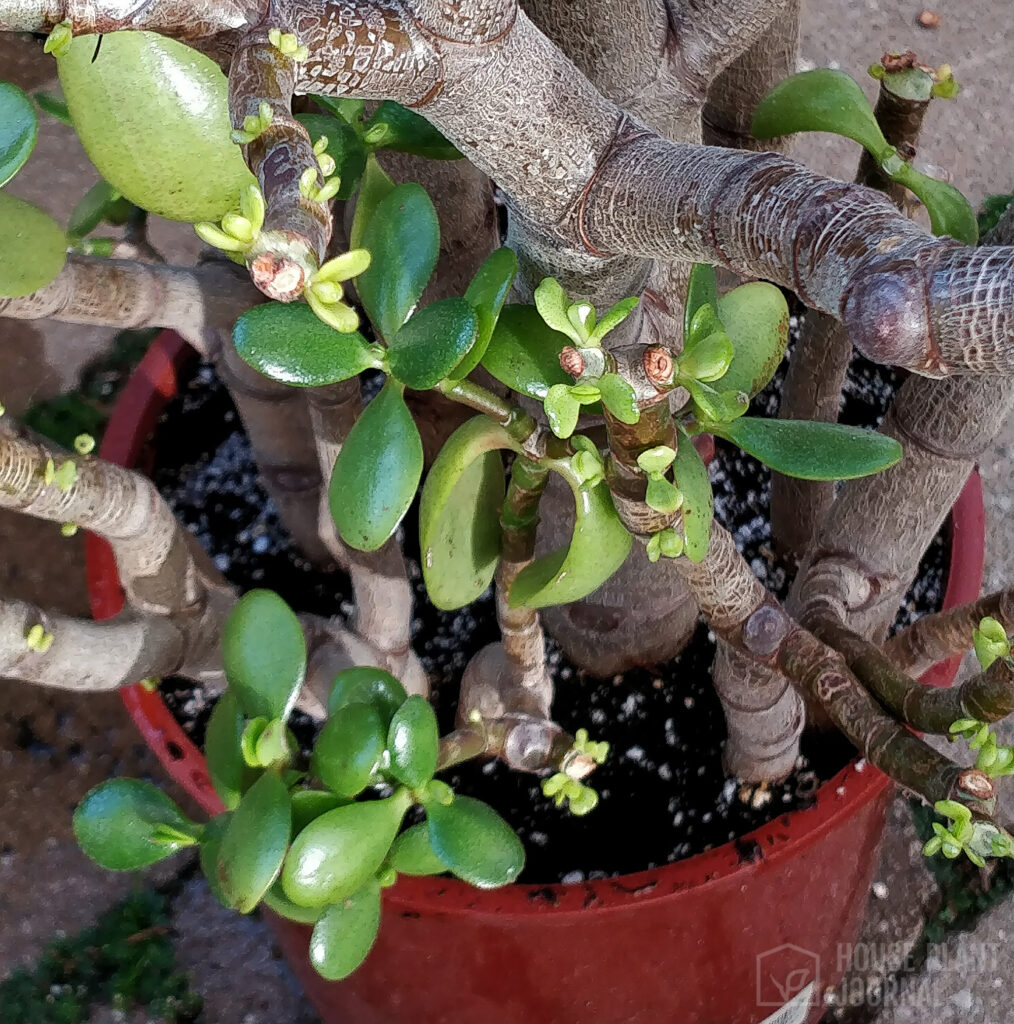
House Plant Journal: Eradicating Mealybugs on Large Jade
I bought my father-in-law a nice large jade plant for his birthday but after a few months, he told me he started noticing some white fluffy things along the stems – it was a mealybug infestation!