The Philodendron tortum is prized for its long, fern-like leaves the get larger with each new leaf. I have documented my P. tortum over a 3-year period (so you can trust that what I’ve done works) with some important details that should help you on your journey.
It’s less about buying perfect leaves and more about buying a healthy root system
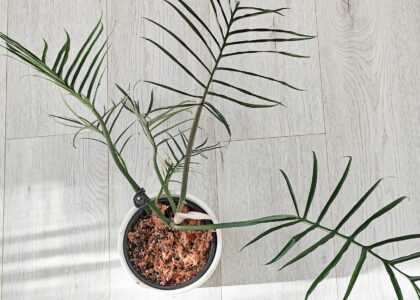
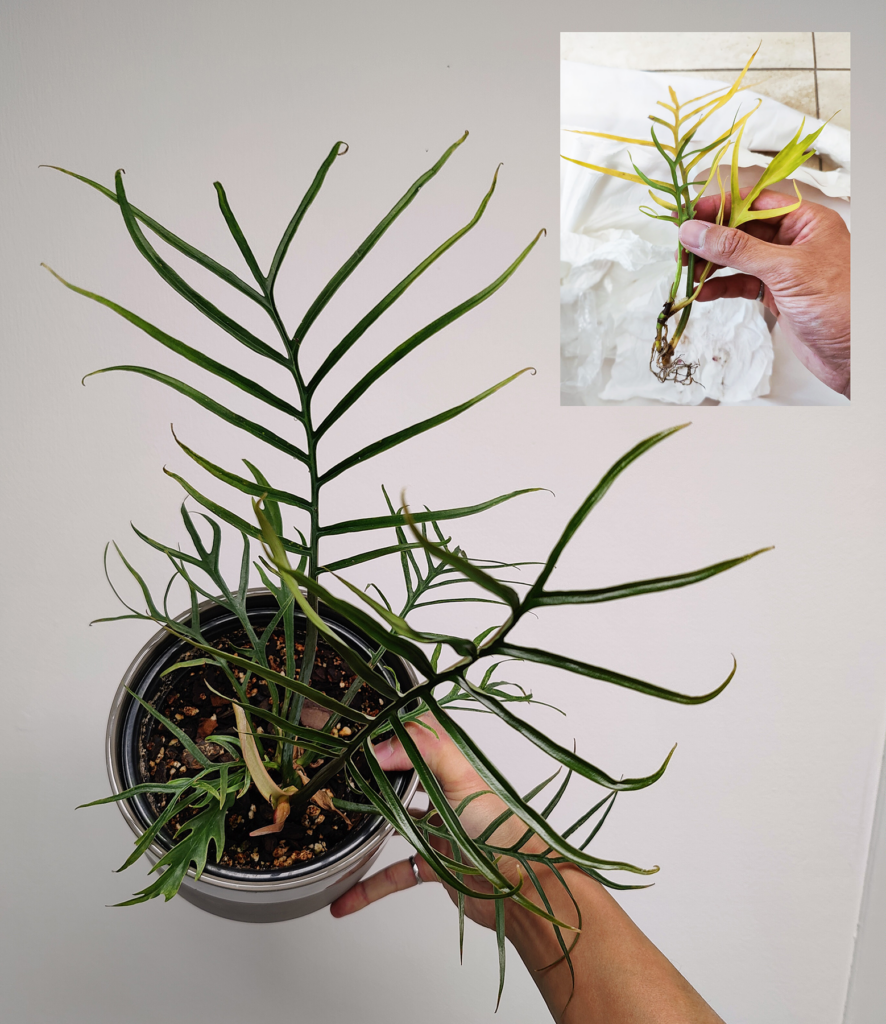
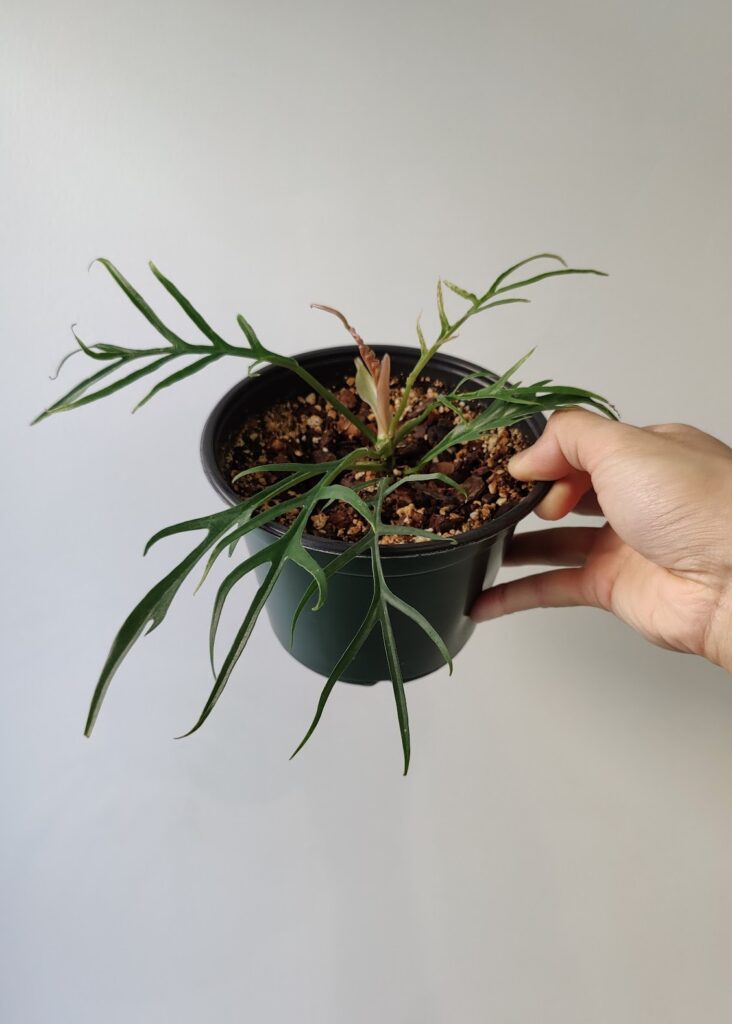
My Philodendron tortum: (inset) arrived quite weakened by the long shipping time but with good care (main photo) new leaves sprouted over the past year.
Day 1: Potting up the new arrivals
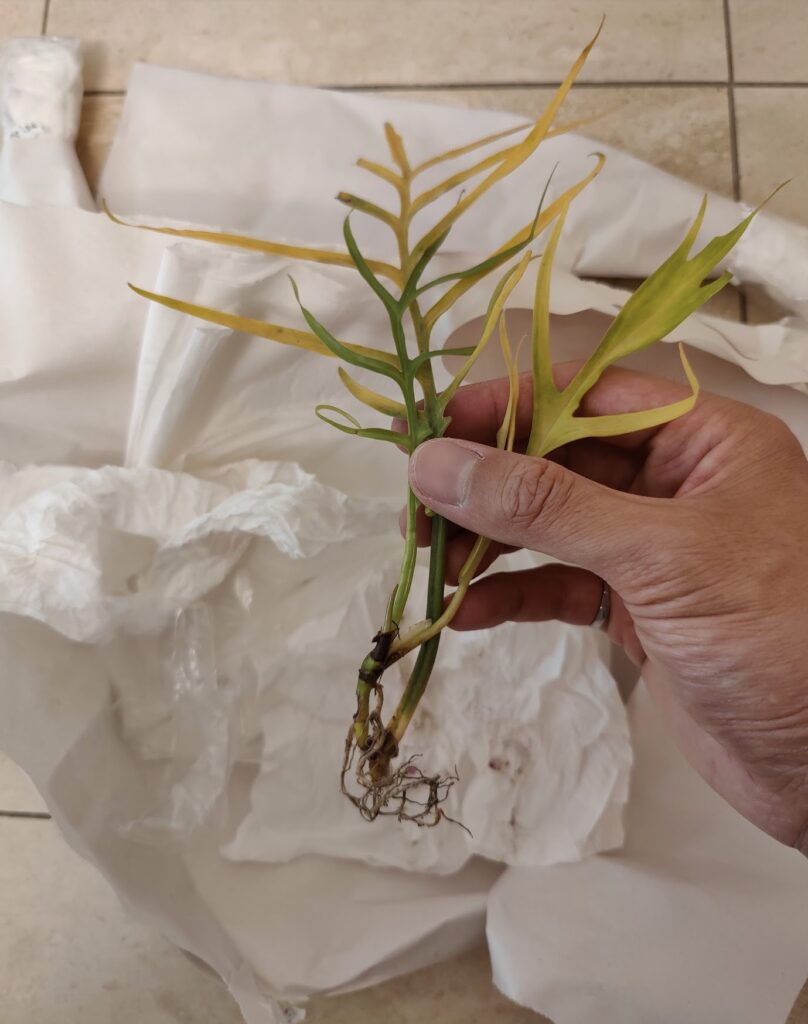
As is typical with imported plants, there was a delay in processing the shipment. Plants that are shipped between countries must be shipped bare-root so the shipper needs to ensure the roots are healthy and kept slightly moistened (usually by wrapping the root system with a moistened paper towel followed by plastic wrap to retain the moisture). It’s a fine line between drying out and rotting!
While it may be disheartening to receive a plant with all yellowing leaves, try to keep a long-term perspective: it’s less about buying perfect leaves and more about buying a healthy root system! While most of the current leaves were yellowing, I didn’t see any rotting in the root system so I was hopeful this plant could make a comeback once potted up.
Long-term perspective: a healthy root system is more important than initially perfect leaves
House Plant Journal
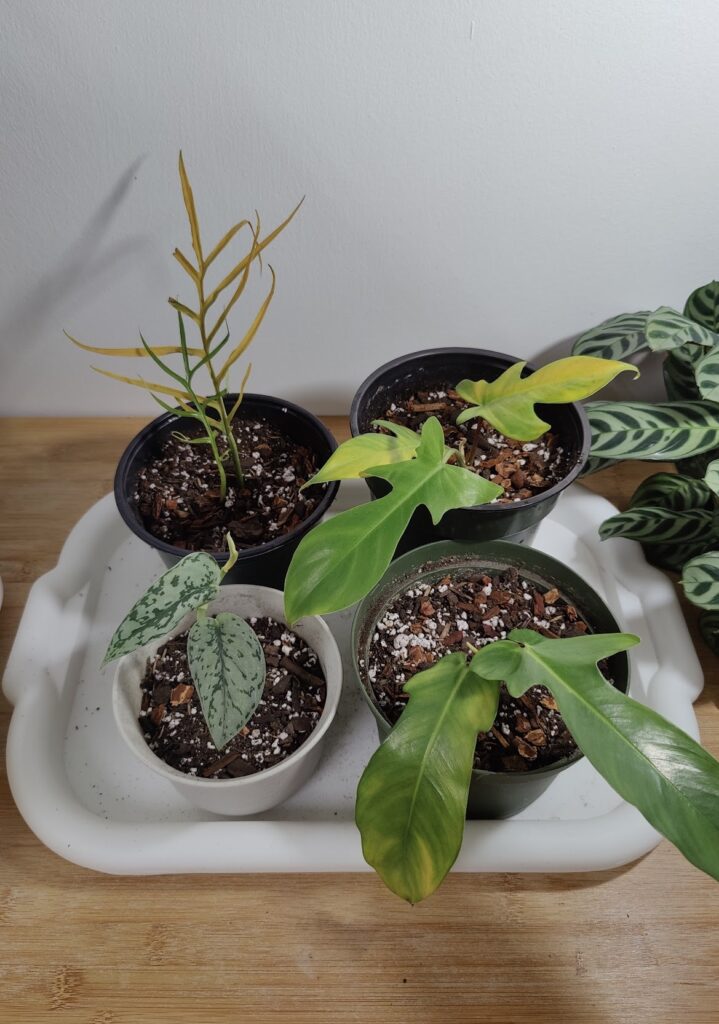
Newly arrived imports have been potted up and are recovering from their long journey in a dark box!
8 Months Later: New leaves!
For those who are very new to houseplant care: yellowing leaves never “heal” and become green again. Instead, good care (which starts with good light) encourages new leaves to grow so you can calmly remove the retired leaves once they are fully gone – they come off easily once they’re finished.
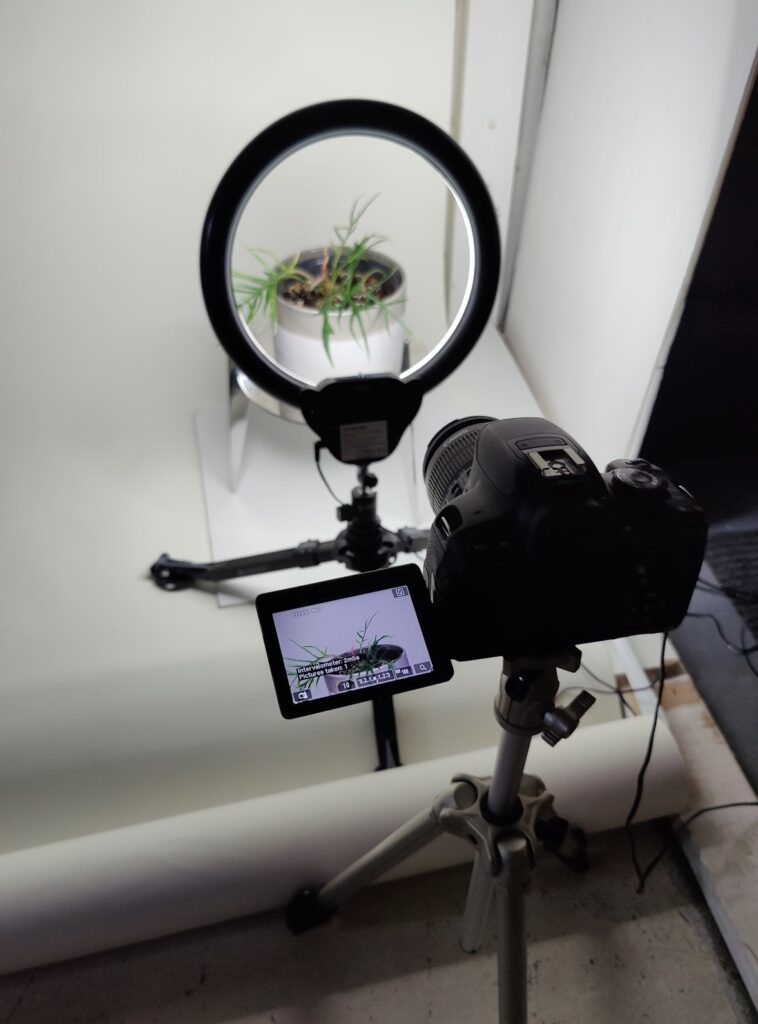
When starting with a juvenile plant, the first 5-6 leaves will be small and not too impressive. Still, I was curious to see how these new leaves emerge so I put the plant through my time lapse setup!
Light: Grow Light Settings for Philodendron tortum White LED measuring 200-400 FC (40-80 µmol/s/m²) at the leaf for 12 hours a day (DLI will be 1.7 to 3.5 mol/day) is adequate for a P. tortum. You can push the growth with more light – for example 800 FC (160 µmol/s/m²) for 16 hours to get 9.2 mol/day – just be sure keep up with watering/fertilizing.
Once you start measuring light, you’ll realize the term “bright indirect light” is meaningless. Learn here
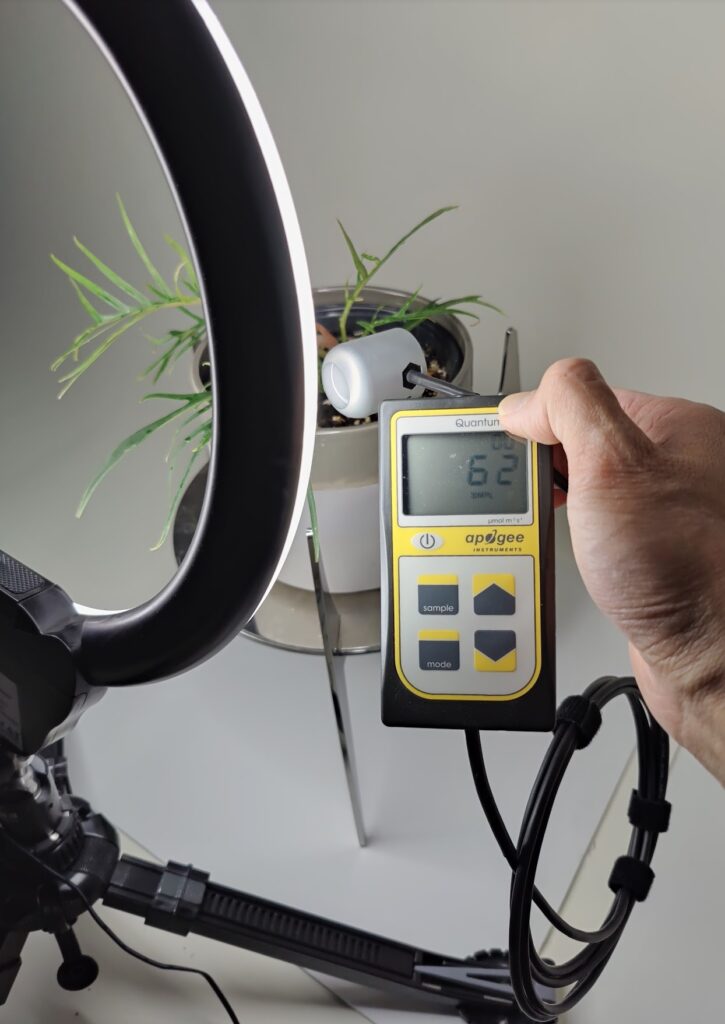
During the time lapse, my plant is getting about 60 µmol/s/m² for 24 hours a day – that’s right, I keep the light on all the time for the time lapse so that the lighting is consistent and it’s totally fine since photoperiod (light and dark phases) does not have an effect on vegetative (leave and shoots) growth (as opposed to flowering).
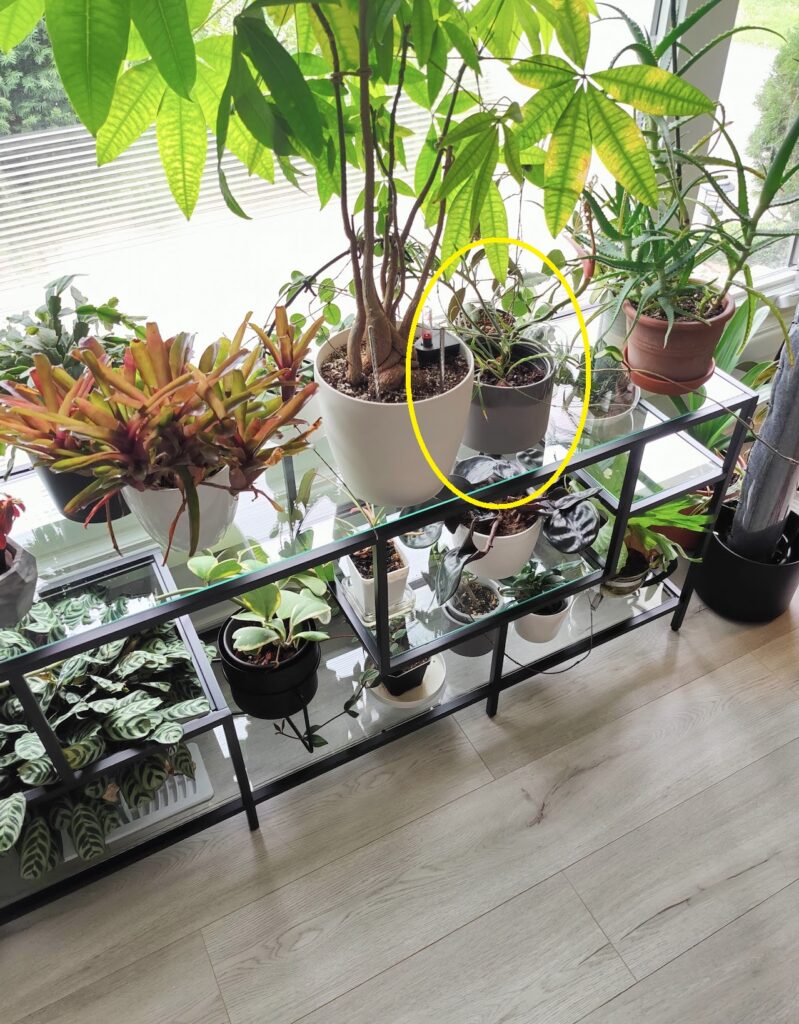
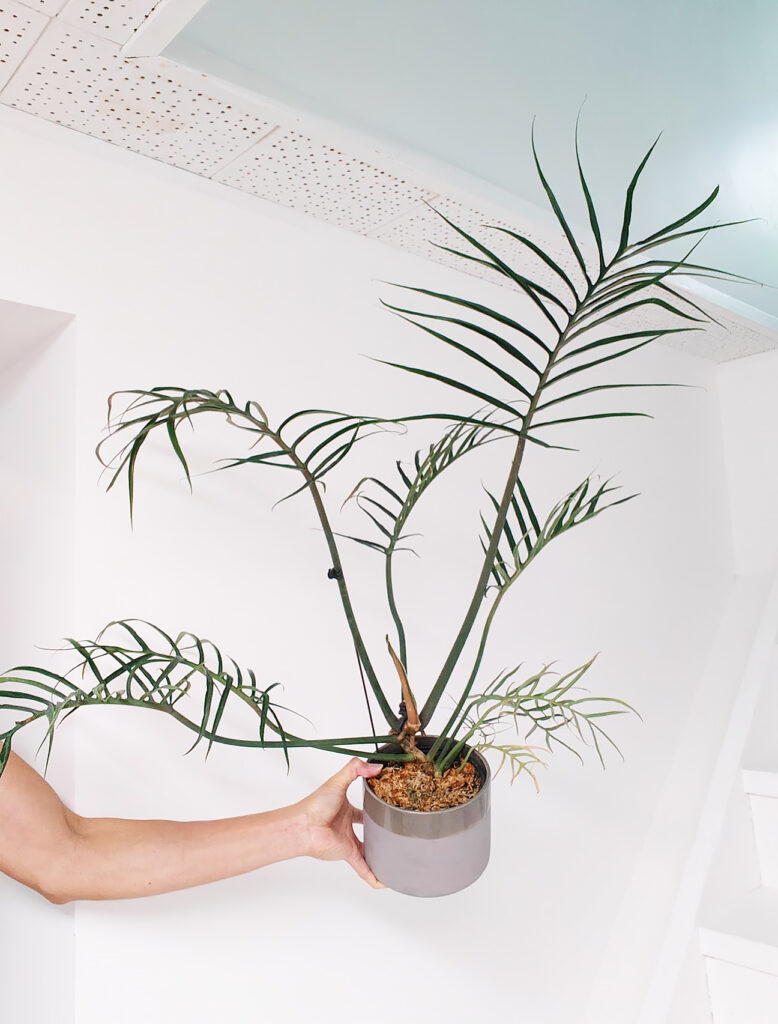
1 Year, 4 Months Later: Living at the Windowsill
As my P. tortum (circled in yellow) outgrew my greenhouse cabinet, I moved it out to the living room window, which faces South-East.
Light: Indoor Natural Light Settings for Philodendron tortum With the plant sitting right in front of my largest window, it grew quite nicely with the following indoor natural light situation: about 2 hours of direct sun and indirect light in the 200-400 FC (40-80 µmol/s/m²) range. If the plant would receive more than 3 hours of direct sun, I would recommend blocking it with a white sheer curtain.
WHEN to Water: For Philodendron tortum, water when the substrate is about halfway dry.
HOW to Water: Fully saturate all parts of the substrate and allow excess water to drain away.
Fertilizing: Since you’re growing the P. tortum for its leaves, a high nitrogen fertilizer with ratio 3-1-2 will be suitable. With good light, you can add fertilizer with every watering. Fertilizer article here
Substrate: As with most aroids, Philodendron tortum appreciates some porosity so I’ve been successful using a standard potting mix (coco coir/peat moss, perlite) with some added bark chips. About 3 parts potting mix to 1 part bark chips works fine.
Propagation & Restructuring: Philodendron tortum propagates easily from node cuttings. It’s very easy to make node cuttings for friends by putting the cuttings into a sealed propagation box filled with moist sphagnum moss. They don’t need much light while propagating: indirect in the 100-200 FC (20-40 µmol/s/m²) range or 100-200 FC x 12 hours by white LED grow light will do.
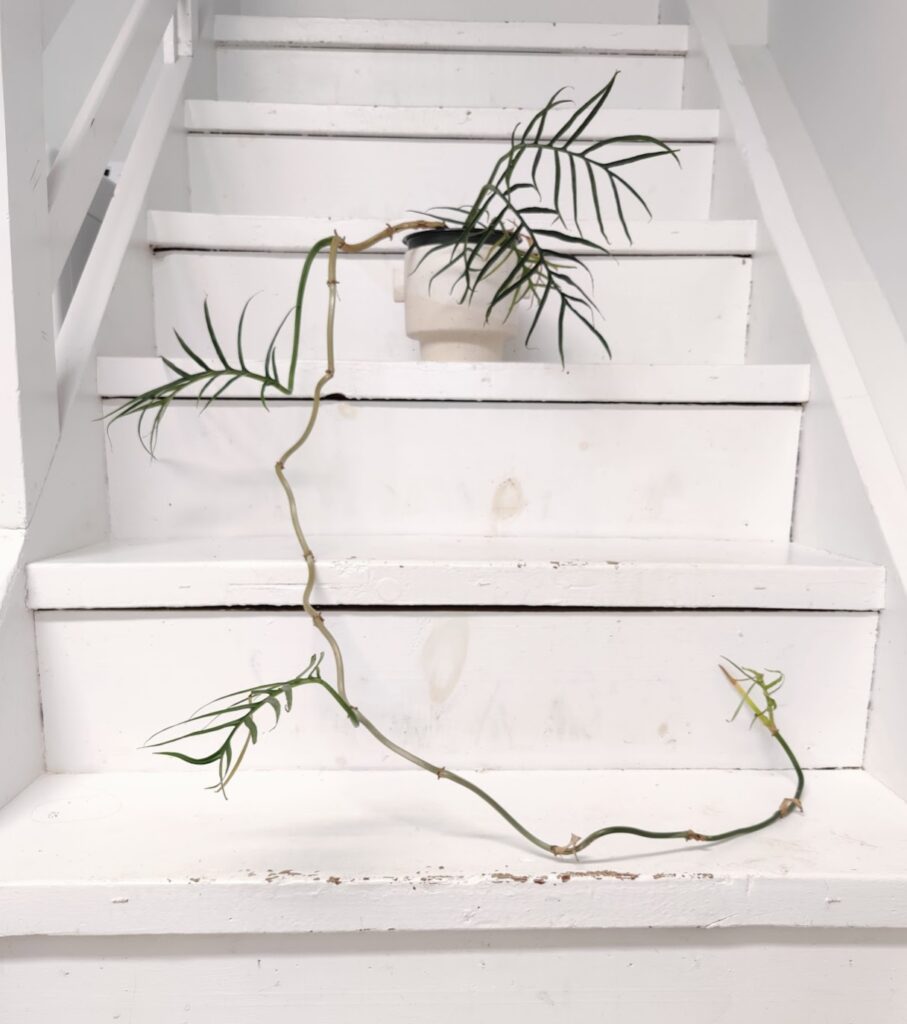
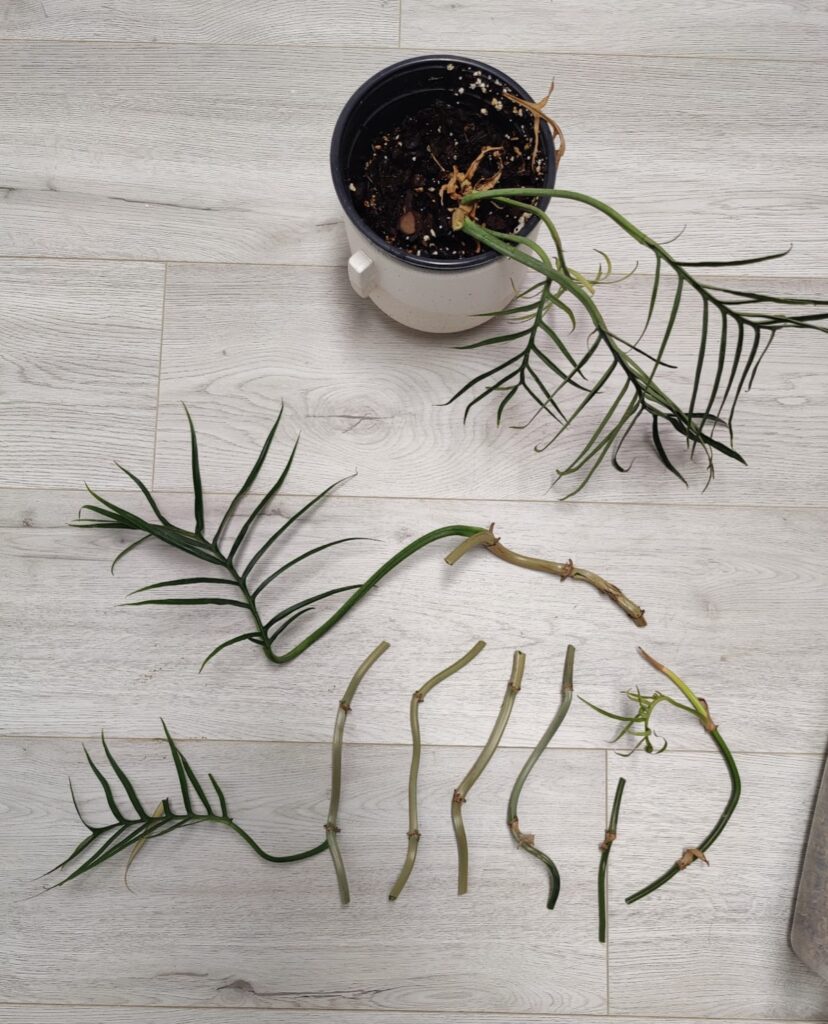
2 Years Later: Long Vine Needs Propagating
As with any vining plant, the Philodendron tortum might send out a leafless vine especially if left hanging without something to climb. It’s time to restructure this plant!I cut the vine into 2-node pieces just to be on the safe side – so each piece has two place where it can grow roots and send up new growth points.
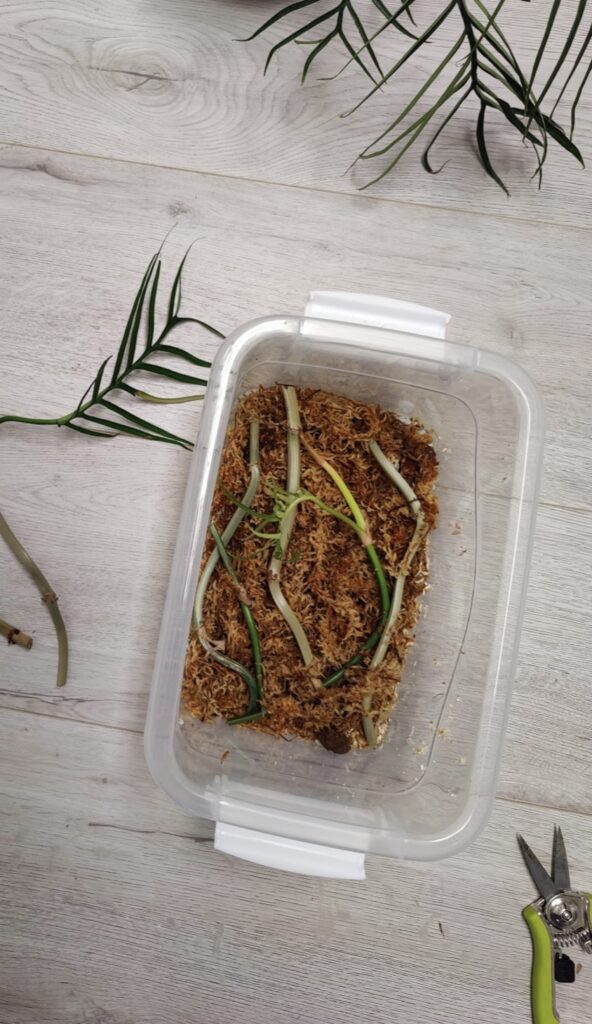
Using a Propagation Box:
A shallow (about 1 inch deep) bed of moist sphagnum moss in a plastic box with lid is perfect for propagating P. tortum. Even the leafless nodes can root and send up new growth points.
The great thing about using a closed propagation box is that it retains moisture so I was able to close it, place it near the windowsill, and forget about it. I ended up giving the fully rooted cuttings to a friend 6 months later.
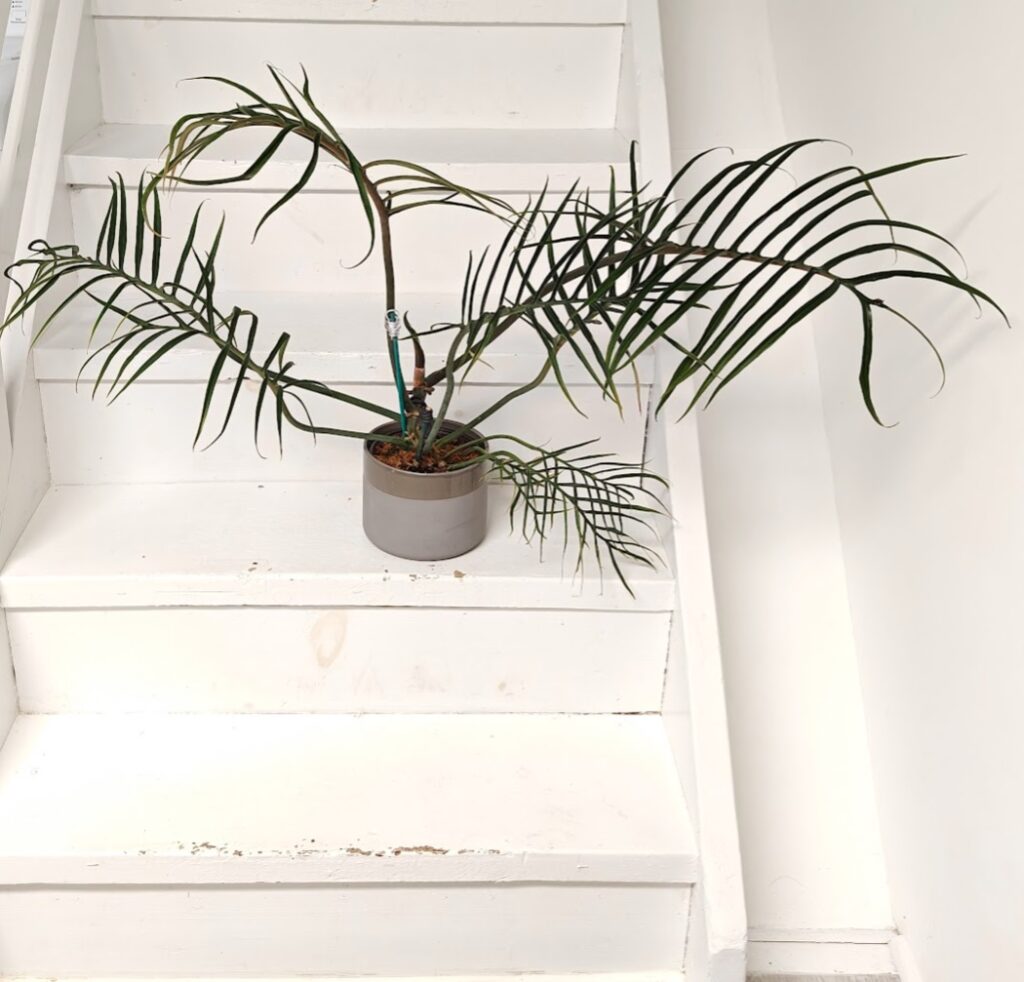
6 Months After Cutting: Looking Much Better
After the chop, the subsequent leaves came out notably larger than the older ones – and no long vine!
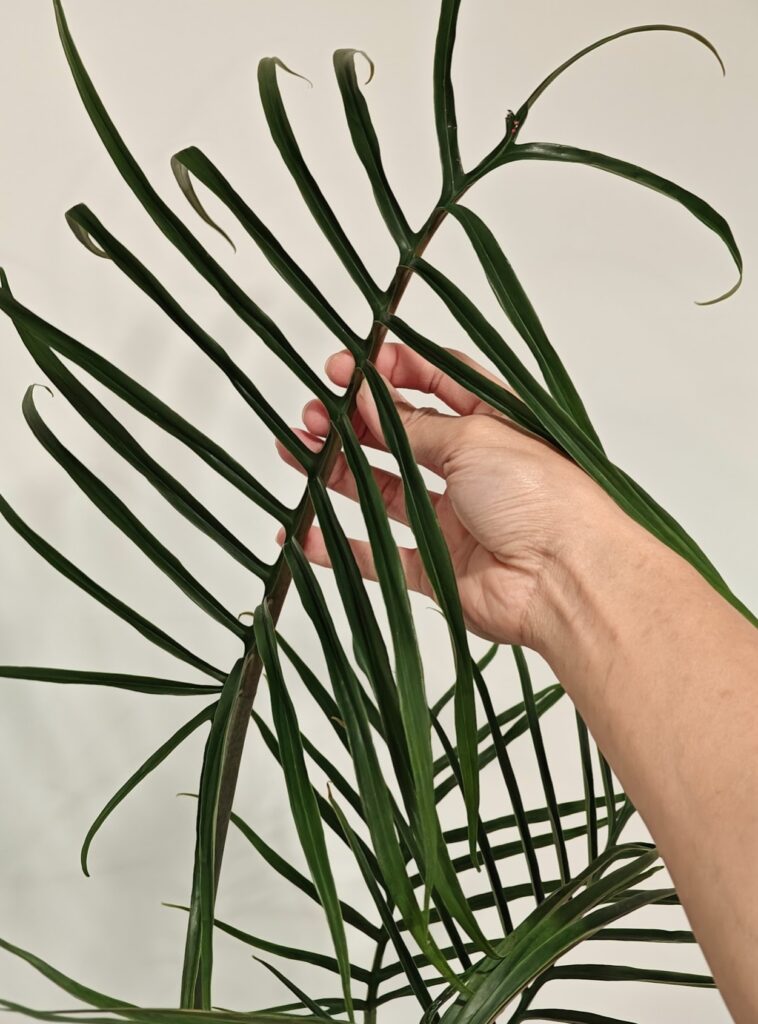
1 Year After Cutting (3 Years Overall): Newest Leaves are Huge!
I only brought the plant to these white stairs to take the picture. It normally lives in front of my large living room window.Here’s the largest leaf and my hand for scale.
Pest Problems
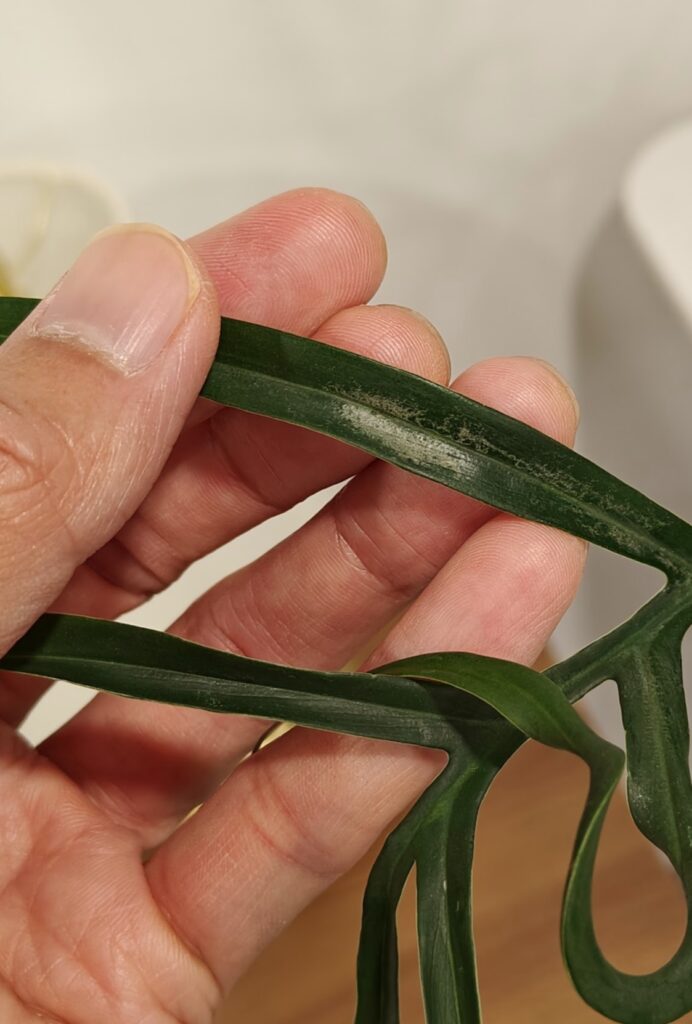
Any of the typical houseplant pests are fair game: mealybugs, spider mites, scale…but thrips seem to LOVE aroids. I’ve had a low-level thrips infestation for a while since there were some plants that I simply refused to part with – my Philodendron tortum being one of them.
Typical thrips damage: silvery scratch marks on the leaf surface. I cut off any leaf sections that were heavily damaged and treated the rest of the plant with insecticidal soap on a weekly basis. I’m happy to repot that after 2 months, I haven’t detected any thrips activity.
I’m very happy with how the plant has grown – the current leaves come out huge and the overall plant has a nice whimsical shape. Some people like mounting the Philodendron tortum to a moss pole but I prefer the “shrub” shape so I will keep propagating the top as it keeps getting longer. I anticipate it will need to be done every 2 or 3 years.